The Water Damage Restoration Process, Step by Step
Published August 26, 2026
Water damage restoration starts with stopping the source, checking moisture, drying the affected areas, removing damaged materials, and rebuilding the space correctly.
The Water Damage Restoration Process, Step by Step
Water damage can start small and become stressful very quickly.
A leaking pipe, failed water heater, roof leak, appliance overflow, toilet backup, shower leak, or storm-related intrusion can damage floors, drywall, cabinets, trim, insulation, framing, and finishes before the homeowner fully understands what happened.
The first goal is simple: stop the water and prevent the damage from spreading.
After that, the work becomes more detailed. The affected areas need to be inspected, dried, documented, cleaned, repaired, and rebuilt correctly. In many homes, water damage restoration is not only about drying the space. It is also about putting the room back together in a way that feels safe, clean, and finished.
For homeowners in Seattle, Kirkland, Bellevue, Redmond, Mercer Island, Sammamish, and the Eastside, water damage restoration should be handled carefully because moisture can linger behind walls, under flooring, inside cabinets, and around older building materials.
Fine Element Construction helps homeowners with water damage restoration, repair, remodeling, renovation, and rebuild work across the Greater Seattle Area.
Step 1: Stop the Source of Water
The first step is to stop the water source.
If the problem is a plumbing leak, the water may need to be shut off. If the problem is a roof leak, the area may need temporary protection. If the water came from an appliance, toilet, tub, shower, or water heater, the source needs to be identified before restoration begins.
There is no point in drying a room while water is still entering the space.
This first step may involve a plumber, roofer, restoration team, or general contractor depending on where the water came from.
The goal is to stabilize the situation so the damage does not keep growing.
Step 2: Make the Area Safe
Before anyone starts removing materials, the area needs to be checked for safety.
Water can affect electrical outlets, lighting, flooring, ceilings, drywall, cabinets, stairs, and structural materials. Wet flooring can become slippery. A ceiling with trapped water may sag. Damaged drywall can weaken. If the water came from a sewer backup or contaminated source, the cleanup process becomes more serious.
Homeowners should avoid walking through standing water near electrical sources and should not start opening walls without understanding what may be behind them.
A safe restoration process starts with caution.
Step 3: Inspect the Damage
Water damage is not always visible.
The surface may look dry while moisture remains behind baseboards, under flooring, inside wall cavities, under cabinets, or around framing.
A proper inspection looks at the visible damage and the likely hidden damage. This may include checking floors, walls, ceilings, trim, cabinets, bathroom areas, kitchen areas, crawl spaces, basements, and nearby rooms where water may have traveled.
The inspection should also identify the type of materials affected. Drywall, carpet, hardwood, laminate, tile, cabinets, insulation, subfloor, and framing all respond to water differently.
The goal is to understand the real scope before repair decisions are made.
Step 4: Document Everything
Documentation matters.
Before materials are removed, the damage should be photographed and documented. This can help with insurance conversations, repair planning, and scope decisions.
Good documentation may include photos of the water source, affected rooms, damaged flooring, wet drywall, swollen cabinets, ceiling stains, damaged trim, moisture readings, and any materials that need to be removed.
This step is easy to skip in a stressful moment, but it can make the process cleaner later.
The more organized the documentation is, the easier it is to explain what happened and what needs to be repaired.
Step 5: Remove Standing Water
If there is standing water, it needs to be removed.
This may involve extraction equipment, wet vacs, pumps, towels, or other tools depending on the amount of water and the affected area.
The goal is to remove as much water as possible before drying begins.
Standing water can continue soaking into floors, baseboards, drywall, cabinets, and nearby materials. The longer it sits, the more damage it can cause.
Once the standing water is removed, the drying process can begin more effectively.
Step 6: Remove Damaged Materials
Not every wet material can be saved.
Some materials dry well if handled quickly. Others may swell, separate, stain, soften, delaminate, or hold moisture too long.
Damaged materials may include baseboards, drywall, insulation, flooring, carpet pad, cabinets, toe kicks, trim, underlayment, or ceiling material. In bathrooms and kitchens, water can also get under tile, behind shower walls, under vanities, and around plumbing penetrations.
The decision to remove material should be based on moisture, contamination, condition, and whether the material can dry properly.
Removing only the visible damage is not always enough. If moisture is trapped behind a finished surface, the problem can continue.
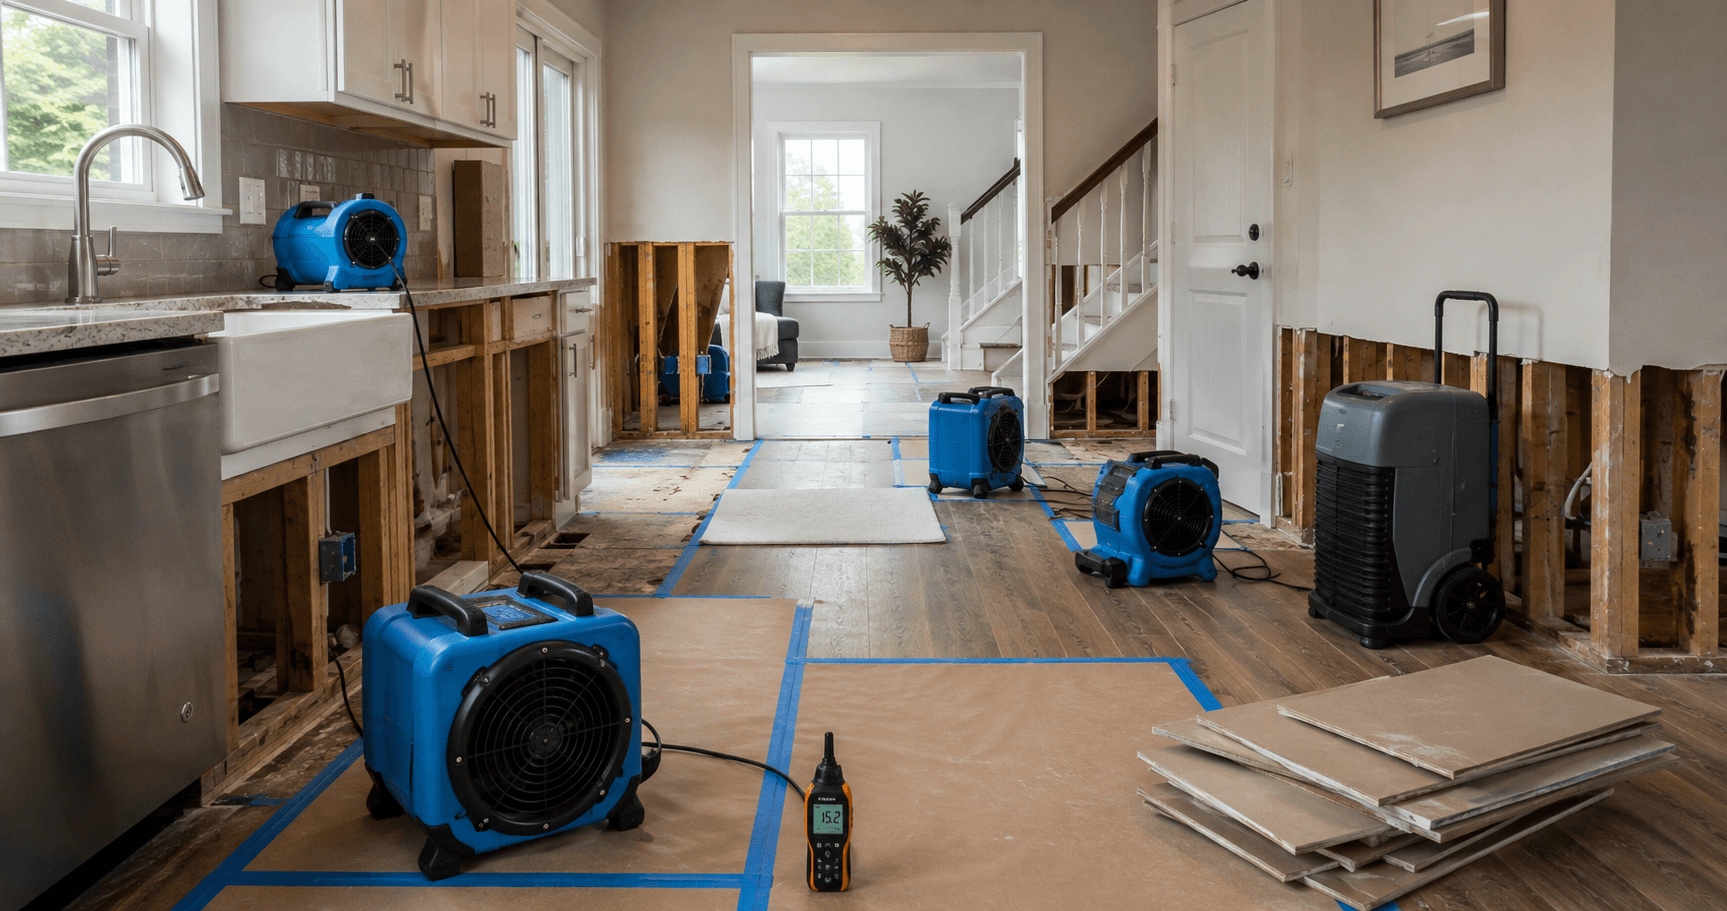
Step 7: Set Up Drying Equipment
Drying is one of the most important parts of water damage restoration.
Fans, air movers, dehumidifiers, and other drying equipment may be used to move air and pull moisture out of materials.
The equipment should be placed based on the affected area, the type of materials, and where moisture is likely trapped.
A bathroom leak may need drying around walls, floors, vanity areas, and subfloor. A kitchen leak may need drying under cabinets, around toe kicks, near the dishwasher, under flooring, or behind drywall. A basement water issue may need a wider moisture-control plan.
Drying is not just about making the room feel dry. It is about reducing moisture inside the building materials.
Step 8: Monitor Moisture
Drying equipment should not be removed just because the surface looks better.
Moisture should be monitored during the drying process. This helps confirm whether walls, floors, framing, or other materials are actually drying.
Some areas dry quickly. Others take longer because of material type, airflow, insulation, hidden cavities, or the amount of water involved.
In the Pacific Northwest, moisture control matters even more because damp conditions can slow drying if the room is not managed properly.
The goal is to avoid rebuilding over wet materials.
Step 9: Check for Mold Risk
Water damage does not always mean mold, but moisture that stays too long can create a mold risk.
The best way to reduce that risk is to act quickly, dry the affected area properly, remove materials that cannot be saved, and fix the source of water.
If there are musty smells, dark staining, repeated leaks, hidden moisture, or old water damage, the area may need additional review.
Homeowners should not cover damaged areas with paint, flooring, or cabinets before the moisture problem is solved.
A clean rebuild starts with a dry and stable space.
Step 10: Clean and Prepare the Area
After drying, the affected area may need cleaning, debris removal, and surface preparation.
This can include removing dust, damaged material, residue, old adhesive, loose drywall, damaged trim, or debris left from demolition.
The area should be prepared for repair, not just cleared quickly.
This is where the project begins to move from emergency response into restoration and rebuild.
Step 11: Repair the Structure and Substrate
Before finishes go back in, the structure and substrate need to be reviewed.
This may include subfloor repair, framing repair, drywall replacement, insulation replacement, ceiling patching, floor leveling, cabinet base repair, tile backer replacement, or correcting damage around plumbing and fixtures.
If the water damage came from a bathroom, waterproofing details may need to be rebuilt properly. If it came from a kitchen appliance, the cabinet area and flooring may need careful repair before new finishes are installed.
The goal is to rebuild on a solid foundation.
Step 12: Replace Drywall, Flooring, Trim, and Cabinets
Once the area is dry and stable, damaged finishes can be replaced.
This may include drywall, paint, baseboards, casing, flooring, underlayment, cabinets, toe kicks, countertops, tile, vanities, or other finish materials.
The repair should not look like a patch if the room is visible and used every day.
Sometimes the work is a direct restoration: replace what was damaged and match the existing finish as closely as possible. Other times, the damage creates an opportunity to remodel the space instead of only repairing it.
That choice depends on the room, the extent of damage, insurance scope, budget, and homeowner goals.
Restoration vs. Remodel
Water damage restoration and remodeling often overlap.
If a small section of drywall was damaged, restoration may be simple. If a bathroom shower leaked for months, or a kitchen dishwasher damaged cabinets and flooring, the better solution may be a remodel.
A bathroom may need new waterproofing, tile, vanity, flooring, ventilation, and plumbing repair. A kitchen may need cabinet replacement, flooring repair, appliance review, and updated finishes. A basement may need moisture control before new walls or flooring go in.
The important thing is to make the right decision for the home.
Restoration brings the space back. Remodeling improves it while the space is already open.
Bathroom Water Damage Restoration
Bathrooms are common water damage areas.
Leaks can come from toilets, tubs, showers, vanities, supply lines, drains, failed caulking, poor waterproofing, or old plumbing.
Bathroom water damage can affect subfloor, drywall, tile, baseboards, vanities, ceilings below, and framing. In older homes, previous remodels may hide weak waterproofing or old plumbing issues.
A bathroom restoration project should not only replace damaged finishes. It should also correct the reason the water damage happened.
If the shower waterproofing failed, replacing tile without rebuilding the wet area correctly may lead to the same problem again.
Kitchen Water Damage Restoration
Kitchen water damage often starts under or near appliances.
Dishwashers, refrigerators, sinks, garbage disposals, ice makers, supply lines, and drain connections can all leak.
The damage may show up as swollen cabinet bases, warped flooring, stained drywall, loose baseboards, damaged toe kicks, or moisture under the floor.
Kitchen restoration can be tricky because cabinets, countertops, flooring, plumbing, and appliances all connect to each other.
Sometimes a small repair is enough. Other times, the damage opens the door to a larger kitchen update, especially if the cabinets or flooring were already near the end of their useful life.
Basement Water Damage Restoration
Basement water damage needs careful attention because moisture can come from several sources.
It may come from plumbing, exterior drainage, foundation issues, sump problems, appliance leaks, or stormwater intrusion.
Before rebuilding basement walls or flooring, the source of water needs to be understood. Covering basement moisture with new finishes can create more problems later.
A basement restoration plan may involve drying, material removal, repair, drainage review, flooring replacement, drywall repair, and sometimes larger moisture-control work.
The goal is not just to make the basement look finished again. It is to make sure the moisture issue is not being hidden.
Roof Leak Water Damage
Roof leaks can damage ceilings, insulation, drywall, framing, paint, flooring, and interior finishes.
The first step is to fix or temporarily protect the roof. After that, the interior damage can be dried, opened if needed, inspected, and repaired.
A ceiling stain may look small, but water may have traveled through insulation or framing before showing up inside the home.
Roof-related water damage should be handled from both sides: exterior source and interior repair.
Appliance Leak Restoration
Appliance leaks can be quiet and slow.
A dishwasher may leak under cabinets. A refrigerator ice maker line may drip behind the appliance. A washing machine supply line may fail. A water heater may leak into nearby flooring or walls.
These leaks can damage floors, cabinets, drywall, trim, and subfloor before the homeowner notices.
The appliance should be disconnected or repaired, the moisture should be checked, and the surrounding materials should be inspected before finishes are replaced.
What Insurance May Cover
Insurance coverage depends on the policy, the source of water, the timing, and the circumstances.
Some sudden water damage may be covered. Gradual damage, long-term leaks, poor maintenance, or flood-related damage may be treated differently.
Fine Element Construction does not replace the insurance company’s decision. But clear documentation, photos, scope notes, and repair estimates can help homeowners have a more organized conversation with their insurer.
Homeowners should contact their insurance provider early and ask what documentation is needed.
Common Mistakes After Water Damage
One common mistake is waiting too long.
Another is drying only the surface while moisture remains under flooring or behind walls. A third mistake is putting new flooring, cabinets, drywall, or paint over materials that are still wet.
Some homeowners also remove too little material because they want to save money, then discover later that the problem continued.
It is also a mistake to focus only on the visible finish. Water damage often affects hidden layers first.
How Long Does Water Damage Restoration Take?
The timeline depends on the source of water, affected area, materials, drying time, demolition, repairs, insurance process, permits, and whether the project becomes a remodel.
A small leak may be handled quickly. A larger kitchen, bathroom, basement, or multi-room water damage project may take longer.
Drying alone can take time, especially when moisture is trapped in flooring, walls, cabinets, or framing.
The key is not to rush the rebuild before the area is ready.
When to Remodel After Water Damage
A remodel may make sense when the damaged area was already outdated, poorly built, or near the end of its useful life.
For example, if water damage ruins old kitchen cabinets and flooring, it may be smarter to redesign the kitchen instead of trying to patch mismatched materials. If a shower leak exposes failed waterproofing, a full shower or bathroom remodel may be the right long-term solution.
This does not mean every water damage project should become a remodel.
It means the homeowner should compare the cost and value of repair versus improvement before rebuilding.
Restoration-to-Remodel Planning
The best restoration-to-remodel projects are planned carefully.
First, stop the water. Then dry and inspect the area. Then decide what must be repaired and what could be improved.
This is especially useful when water damage affects kitchens, bathrooms, basements, flooring, or older homes.
A homeowner may choose to restore the room to its previous condition, or they may use the opportunity to improve layout, storage, materials, waterproofing, ventilation, or finishes.
The right decision depends on the home and the damage.
Water Damage Restoration in Seattle and the Eastside
Fine Element Construction provides water damage restoration, repair, remodeling, and renovation services across the Greater Seattle Area, including Seattle, Kirkland, Bellevue, Redmond, Mercer Island, Sammamish, and nearby Eastside communities.
Our team helps homeowners review water damage, remove damaged materials, coordinate repairs, rebuild affected rooms, and plan remodeling work when the damage creates a larger opportunity to improve the space.
Water damage restoration should not be rushed. The source needs to be fixed, the area needs to dry, damaged materials need to be removed, and the rebuild needs to be done correctly.
Dealing with water damage in your home? Contact Fine Element Construction to review the affected area, understand the next steps, and plan the repair or remodel the right way.